/
How Do I Create a Group?
How Do I Create a Group?
- Rhea Bradley (Unlicensed)
- Jesse Dickert
- Will Skrundz (Unlicensed)
Owned by Rhea Bradley (Unlicensed)
How do I create a Group?
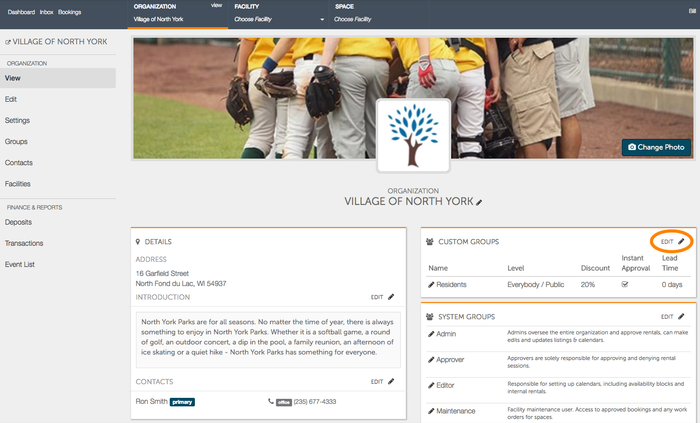
Starting at the organizations administrative home page, locate the Custom Groups heading on the right hand side and select the pencil icon to begin creating your group.
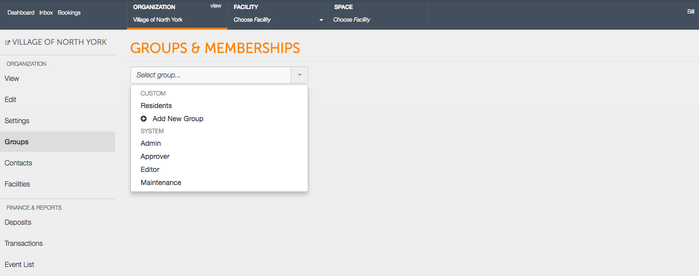
- You will be brought to the Groups & Memberships page where you can create, edit, and delete different groups within your organization. To create a group, begin by clicking the arrow on the drop-down box titled “Select group…” and click +Add New Group.
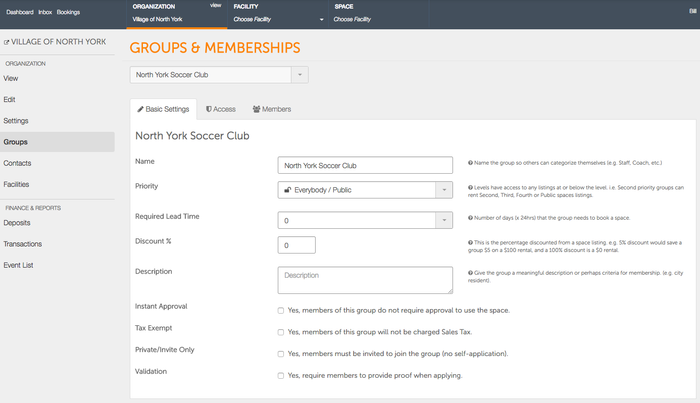
- Once you select to add a new group, you will have a list of settings to begin inputting. Start at the top with "Name" and input the name of the group you are creating. This can be anything such as Residents, North York Soccer Club, Members, etc. Users will be able to see the group name on your organization page.
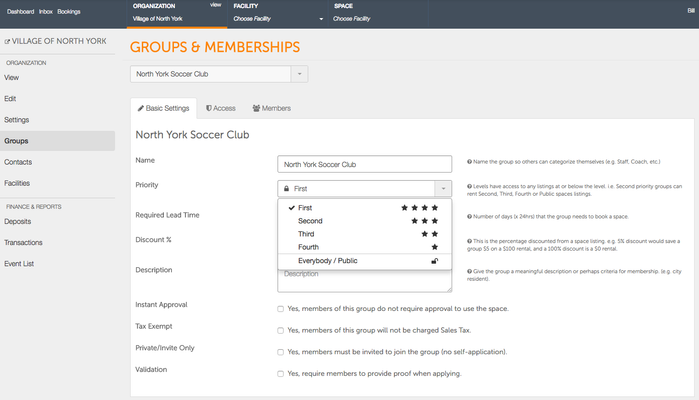
- After inputting a name for your group, the next thing to do is set a priority level. Setting a priority level will give members of the group access to book times and availability that are set with a priority level. Admins, when setting their availability, can have their availability set at a specific priority level where only members of groups with that priority level access can book.
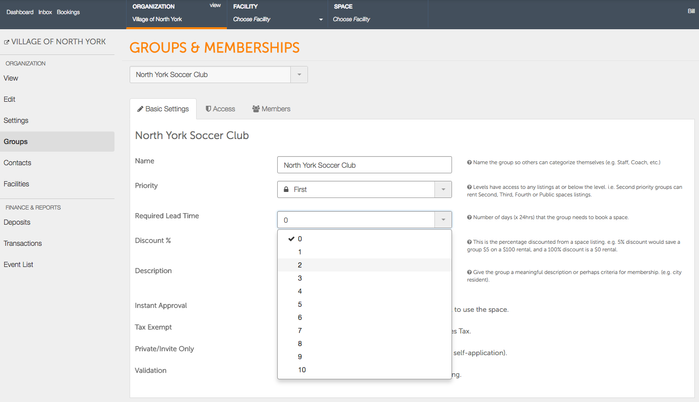
- After setting a priority level, the next item to do is setting Required Lead Time. The lead time refers to how many days in advance must the organization have for the renter to book. If lead time is set for 2 days, then a renter could not book space on the current or next day, but would have to wait 48 total hours to book a space. If the lead time is set for 0 days, the renter could book space for the current day. To set lead time, click on the drop down box next to Required Lead Time and select the number of days required to book a space.
- Once you set your lead time, you can make your way down to setting a Discount %. The discount percentage will apply to the booking and will allow renters in that group to book space at a discount. You can set the discount percentage from 0% up to 100% ($0 rentals). Note: When a discount is applied to a booking, charges for add-ons will still be included in the final booking total.
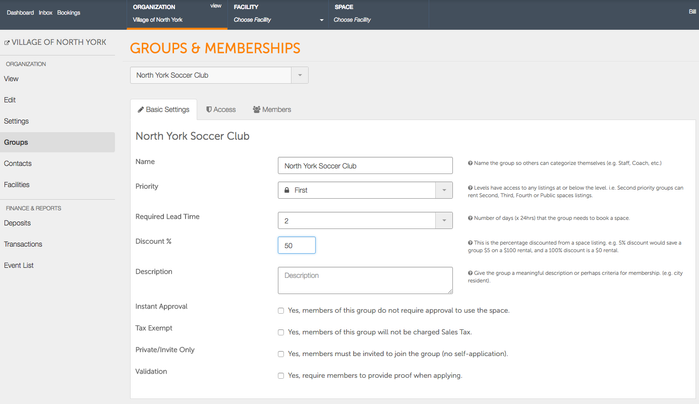
- Below Discount % is description. Here, you can type in a description about the group so that members who would like to join the group have a better understanding of what they are joining.
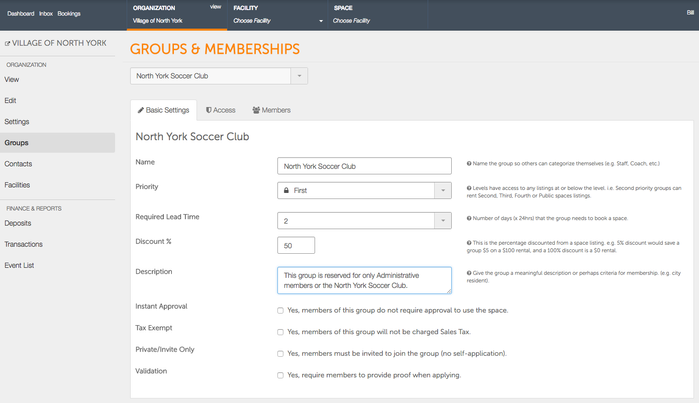
- After you have input a description you can give your group Instant Approval, that is, having the ability to book a space without requiring an organization admin member to approve or deny the rental. Click the check box if you would like to give group Instant Approval access.

- Following Instant Approval is Tax Exempt. If you are creating a group for a tax exempt organization, you will need to turn this setting on.

- You have the ability to make your groups private as well. If you make the group private, the members of the group will need to be invited by you or another member of the group.

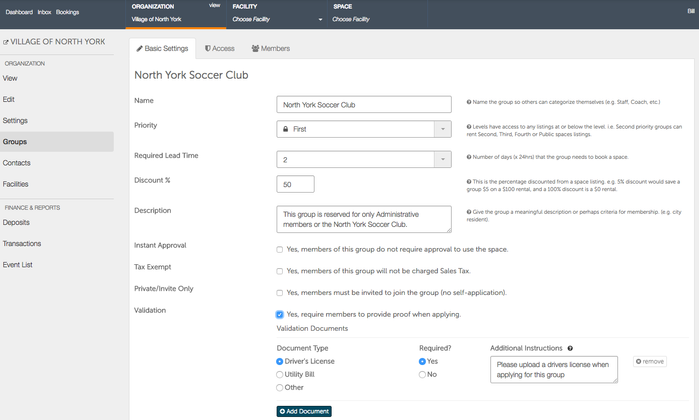
- Lastly, if the group you are creating is public, you can require users to prove they are a member of the group by uploading a document or photo when applying to be a part of the group. If you select the check box to require validation, you will be given a range of documents you can require the user to upload, such as a drivers license, utility, or otherwise.

- When you are finished creating the group, select
 . You will see a green confirmation box appear confirming the group.
.png?version=1&modificationDate=1513021624628&cacheVersion=1&api=v2&width=299&height=71)
, multiple selections available,
Related content
How Do I Create Required Lead Time?
How Do I Create Required Lead Time?
More like this
How Do I Create A Group Priority?
How Do I Create A Group Priority?
More like this
How Do I Create Availability?
How Do I Create Availability?
More like this
How Do I Create A Private Group?
How Do I Create A Private Group?
More like this
How Do I Join a Group?
How Do I Join a Group?
More like this
How Do I Create A Rental For Another User?
How Do I Create A Rental For Another User?
More like this